

TL;DR:
- Creating a stunning rose display relies on proper preparation, mechanics, and technique, with careful conditioning prolonging vase life. Using support materials like soaked foam and tape grids provides structure, while grouping roses in odd numbers enhances natural appearance. Consistent daily care, including water changes and misting, keeps the arrangement fresh and visually appealing.
Creating a beautiful rose display is one of those skills that looks effortless once you know the steps, yet leaves most beginners second-guessing every cut and placement. The gap between a limp, overcrowded vase of roses and a genuinely stunning arrangement comes down to preparation, mechanics, and a few techniques that professional florists use every time. This rose display step by step guide walks you through everything: what to gather, how to condition your blooms, how to build the arrangement, and how to keep it looking fresh for as long as possible.
Table of Contents
- Key takeaways
- Rose display step by step: tools and materials
- Preparing your roses for the display
- Assembling the rose display
- Finishing touches and daily maintenance
- My honest view on rose display craftsmanship
- Start your display with premium roses from OnlyRoses
- FAQ
Key takeaways
| Point | Details |
|---|---|
| Prepare before you arrange | Conditioning roses with water for several hours before arranging dramatically extends their life. |
| Mechanics make structure | A floral tape grid or pre-soaked foam gives every stem a stable, purposeful position. |
| Odd numbers look natural | Grouping focal roses in odd numbers creates a more balanced, visually pleasing display. |
| Daily care is non-negotiable | Refreshing water, misting, and trimming stems each day keeps your display looking its best. |
| Finishing touches matter | Hiding mechanics with moss or greenery is what separates a polished display from an amateur one. |
Rose display step by step: tools and materials
Before you arrange a single stem, you need the right materials in front of you. Trying to improvise mid-arrangement is where most beginners lose confidence.
Choosing your roses
Not all roses are equal for display work. Long-stemmed varieties with large, firm blooms hold their shape and suit most vase and foam-based arrangements. For a classic centerpiece arrangement, look for roses with tight outer petals that will unfurl gradually over several days.

Supporting materials
| Material | Purpose |
|---|---|
| Floral foam (soaked) | Holds stems at precise angles and supplies constant moisture |
| Floral tape or clear tape | Creates a grid across the vase opening for stem support |
| Waterproof tape | Secures foam inside the vessel |
| Floral preservative | Extends water freshness and reduces bacterial growth |
| Cutting shears or a sharp knife | Clean cuts without crushing stems |
Beyond the roses themselves, you will want supporting greenery such as eucalyptus, ruscus, or Italian ruscus. Baby’s breath, wax flower, or spray roses work as filler. A sturdy, clean vessel completes the kit.
Preparing your roses for the display
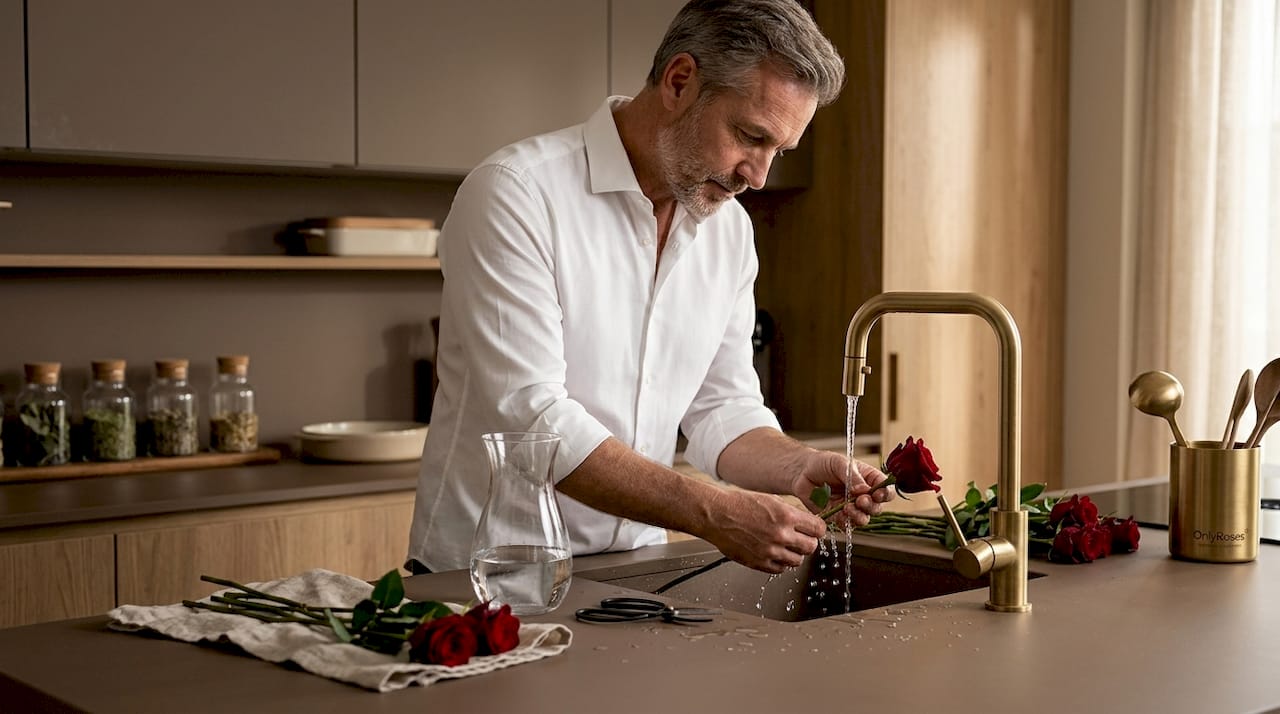
This is the step most people skip, and it is the single biggest reason rose displays fail within a day or two. Patience here pays off visibly.
- Fill a clean bucket with cool water and add a sachet of floral preservative. Warmwater speeds petal drop, so cooler is better.
- Cut each stem at a 45° angle, removing at least 2.5 cm from the base. A 45° cut increases the surface area for water uptake, which directly prolongs vase life.
- Strip leaves from the lower two-thirds of the stem. Submerged leaves rot quickly, feeding bacteria that cloud the water and block the stem.
- Place roses immediately into the prepared bucket and leave them to hydrate. Conditioning overnight is the preferred approach for maximum turgidity and a longer-lasting display.
- Prepare your floral foam. Place it in a bowl of water mixed with preservative and let it absorb water naturally. Saturate foam gently without pushing it under; forcing it creates air pockets inside, which will leave certain stems without moisture support.
- Apply a tape grid across your vase opening if you are working without foam. A tape grid segments the opening and keeps stems exactly where you place them, reducing the amount of material you need for a structured arrangement.
Pro Tip: Cut stems under water if possible. This prevents air from entering the stem before it reaches the vase water, which keeps water uptake flowing freely.
Assembling the rose display
Now the creative work begins. The key is building outward in layers, starting from structure and moving towards detail.
- Secure your prepared foam inside the vessel using waterproof tape crossed over the top. The foam should sit just above the rim so you can insert stems at outward angles without snapping them.
- Insert your greenery first. Starting with greenery creates a stable framework and adds visual depth before a single rose goes in. Work around the arrangement so no side looks bare.
- Place your focal roses. Position your largest or most open blooms first. Use odd numbers of focal roses as this closely mirrors natural growth patterns and feels less rigid to the eye. Vary the heights slightly rather than cutting everything to the same length.
- Add secondary roses and filler. Fill gaps between focal roses with smaller blooms or spray roses, then tuck in filler flowers like wax flower or baby’s breath. These add texture and soften the overall shape without competing with the focal roses.
- Step back regularly. Viewing your display from one metre away reveals imbalances you cannot see close up. Rotate the vessel and adjust any stems that create crowding or gaps.
- Check angles and depth. Some stems should angle slightly downward over the rim of the vessel. This creates a natural, cascading look rather than a flat, upward-pointing cluster.
Pro Tip: If a stem is too short after trimming, cut a small section of waterproof tape and use it to extend the stem by attaching a toothpick or thin wooden skewer alongside it before inserting into the foam.
You can find additional ideas on decorating with roses at home if you want to take the arrangement further once your core display is complete.
Finishing touches and daily maintenance
A finished arrangement is not a finished job. What happens in the days after assembly determines whether your roses last three days or ten.
- Hide the mechanics. Tuck sheet moss, additional greenery, or decorative stones around the base of stems to cover any visible foam, tape, or the vessel interior. This single step transforms an arrangement from functional to polished.
- Address stem slumping immediately. If a rose droops shortly after arranging, remove it, recut the stem at an angle, and place it in very warm water for 30 minutes before reinserting. This often revives a wilting bloom entirely.
- Change the water daily if you are using a vase rather than foam, and recut stems by 1 cm each time. For foam arrangements, top up with fresh water mixed with preservative every day.
- Mist the blooms lightly in the morning using a fine spray bottle. Roses appreciate humidity, particularly in centrally heated rooms.
- Position your display away from direct sunlight, heat sources, and fruit bowls. Ethylene gas from ripening fruit accelerates petal drop noticeably.
- For longer-lasting rose display ideas, consider preserved roses, which maintain their appearance for months without water or maintenance.
My honest view on rose display craftsmanship
I have seen a lot of rose arrangements over the years. I have watched beginners rush the conditioning step because they are excited to get to the arranging, and the result is almost always a droopy display within 48 hours. What I have learned is that the arranging itself takes perhaps 20 minutes. The preparation takes several hours. That imbalance surprises people, but it is the reality.
The other thing I would tell any beginner: do not overcrowd. There is a temptation to fill every inch of visible space, but the most striking arrangements I have seen always have breathing room between the blooms. Restraint is a skill, and it takes practice to trust it.
Mechanics are not cheating. Using a tape grid or soaked foam is what professional florists do every single time. It gives you control, and control gives you creativity. Once you are not fighting to keep stems upright, you can focus entirely on shape, colour, and proportion.
Experiment freely. Try mixing deep burgundy roses with pale blush fillers, or go monochromatic with a single colour in varied bloom sizes. For guidance on building a more structured arrangement, the luxury rose bouquet guide from OnlyRoses is worth reading before you start.
— Anian
Start your display with premium roses from OnlyRoses

The quality of your roses determines the ceiling of your arrangement. If the stems are weak or the blooms are already open on arrival, no amount of technique will save them. OnlyRoses sources exclusively from high-altitude farms in Ecuador, where consistent growing conditions produce long stems, deep colour saturation, and firm blooms that condition beautifully before arranging.
For anyone building a DIY display, the classic rose stems available from OnlyRoses offer the ideal starting point: reliable stem length, consistent bloom size, and a bright mix of colours suited to centrepieces, table arrangements, and gifting designs alike. If you want a ready-made focal piece or a luxurious gift, the Classic Rose Heart collection delivers the kind of arrangement that speaks for itself.
FAQ
How long should I condition roses before arranging?
Conditioning roses overnight in cool water is the preferred approach for maximum hydration and longevity. A minimum of four to six hours is recommended if overnight conditioning is not possible.
What is the best container for a rose display?
A clean vase, low bowl, or decorative vessel with a stable base all work well. The choice depends on whether you are using floral foam or a tape grid, as foam requires a container deep enough to hold it securely.
How do I stop my rose display water going cloudy?
Add a floral preservative sachet to the water from the start, remove all leaves below the waterline, and change the water every day. Recut stems at the same time to prevent bacterial build-up at the base.
Can I use preserved roses in a display arrangement?
Yes. Preserved roses are ideal for long-term displays as they require no water or daily care and retain their appearance for several months. They work particularly well in hat boxes, domes, or decorative vessels where fresh water is impractical.
How many roses do I need for a centrepiece?
A standard table centrepiece typically requires between 12 and 20 stems depending on bloom size and the scale of the vessel. Using focal roses in odd numbers within that count creates the most natural visual result.

